Creating a task
Detailed instructions for creating and launching a task in AssistBot
To create a task, you need:
- Go to "Create" > "Create task";
- Click on "Create task" button;
- Enter the task name. The name will be visible only to company administrators and allows to easily identify the task in the admin panel;
- Enter description of the task. The description will be sent to all responsible members of the task;
- Next, you will see the task item blocks. The items will be shown to members in the order they are located in the task creation window. To change the order of items, use the sort buttons:

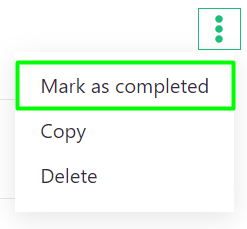
Any task item can be marked as completed \ uncompleted in the context menu of the item:

- Enter the text of the step. This is the subtask text, which will be seen by the responsible member;
- If desired, set the deadline. The member will be notified one hour before the deadline. The deadline is linked to the company's time zone;
- Select the responsible member. You can enter a name in the field or select a member from the list by clicking on the "Find member" button.
- You can create the required number of task items by clicking on the "Add item" button and assigning them to responsible members. So, one task can contain several items what can be performed by different people:

- Select the notification frequency. The system will remind about the task according to the selected frequency on the days specified below;
- Select the notification days. The system will remind about the task on the specified days according to the selected periodicity from the previous step;
- If you want, check the "Take work start time of each member" if you want the system remind about the task at the working days start time specified in the personal settings of members. It is recommended to use it only if you are sure that all members have configured their time correctly;
- Set the "Survey time". This option will be active only if feature at the previous step was not enabled;
- If desired, select "Channel for results". You will be notified in the selected messenger’s channel whenever members complete or cancel the task items. The channels must be connected to the company. Read the relevant help section;
- If desired, check "Get email when each task item has been completed". You will receive email notifications whenever your members complete or cancel task items. Do not forget also to enable the appropriate option in your personal profile settings. This feature is available in paid tariff plans;
- If desired, check "Take working days of each member". If activated, the system will remind members about the task only on those days that were specified in their personal settings. It is recommended to use only if you are sure that all members have configured their working days correctly;
- If desired, check "Take vacation days of each member”. If activated, the system will not remind about the task those members who are on vacation. It is recommended to use it only if you are sure that all members have set their vacations correctly;
- If desired, check "Take time zone of each member". If activated, the system will remind about the task according to the time zones specified in the personal settings of members. It is recommended to use it only if you are sure that all members have set their time zones correctly;
- Click on "Save" button;
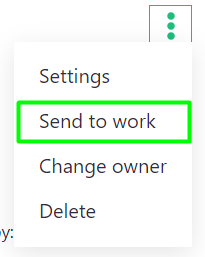
- To start the task, send it to work:

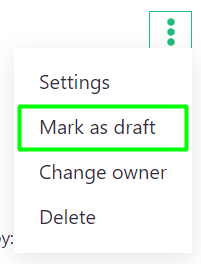
You can stop the task at any time by marking it as a draft from the context menu:

Upon completion of any task, you can re-send it to the work from the context menu if necessary. Keep in mind that in case of restart, all task items are marked as uncomplete and the whole history of the selected task will be cleared:

Keep in mind that tasks send alerts once a day. For example: you have created and activated a task that will notify the responsible members today at 12:00. After the notification, you decided to change the time to 14:00. In this case, the task will no longer send notifications again today. The task will notify the members only the next appointed day at 14:00.